

Mines Guide
Choose when to climb and when to farm, use lures and friend units well, and prepare the right counters for regular and Omega bosses.
Adapted from Monokhrome's Revised GS Mines Guide, updated September 21, 2026. Boss cards come from that guide. Mode mechanics, rewards, and additional visuals also draw on the GSGL Advisor Team guide credited below. Source conflicts and outdated advice are noted.
On this page
Start with the encounter, not a fixed team
This page covers Mines versions of the bosses. A boss with the same name in Giant Bosses or Crest Palace can have different mechanics. Ω means Omega, a variant with additional restrictions.
This guide combines Monokhrome’s encounter strategies with the GSGL Official Discord Advisor Team’s Mines Guide, whose update label is 10/6/2025. The Advisor guide adds progression, lures, rewards, and equipment tradeoffs; Monokhrome also covers newer encounters such as Marzex and Ragsherum. These are community references, not a record of fresh gameplay testing.
New to Mines? Start with floor progression, then friend units. Farming a drop? Read lures and equipment. For battle terminology, see the Beginner’s Guide and Technical Guide.
Before entering a fight, check:
- Can your damage reach the boss? Look for element immunity, physical/magic negation, critical resistance, evasion, or a required ailment.
- Can you survive the waves before it? A boss-specific team still has to reach the boss alive.
- What happens at its HP thresholds or at zero HP? Save the right protection and a second burst when needed.
A nuke is a short burst intended to end a fight quickly. Sustain means keeping the team alive through repeated Arts cycles. Neither bypasses every mechanic. If your team cannot satisfy an encounter’s requirements, skipping it is a reasonable choice.
How floor progression works
Mines is a returning event made up of basement levels, written B1, B2, B3, and so on. You can see the next boss before entering, so change your team for that encounter.
Every attempt costs stamina, including a failure or quit. The Advisor guide lists an initial cost of 10 stamina, increasing by roughly one per ten floors; check the entry screen for the actual cost.
| What happens | Effect on progress |
|---|---|
| Enter a new floor | Start with 50 evaluation points. |
| Win a fight | Gain points; faster clears and Omega bosses can award more. A unit death substantially reduces the result. |
| Reach 100 points | Advance to the next floor. |
| Fail or quit | Lose points; consecutive failures or quits carry a larger penalty. |
| Fall to zero points | Move back one floor. |
| Reach each fifth floor | Unlock a checkpoint for returning to earlier depths. The source lists a 30-minute cooldown on changing depth this way. |
Aim to finish the boss within three minutes. After that, the source describes a rage phase with extremely strong attacks. A team that survives indefinitely can still be a poor climbing team if it cannot finish in time.
You can enter and quit to reroll an unsuitable boss, but that spends stamina and loses progress. Use it deliberately when a missing counter makes a clear unlikely. For farming, an easier checkpoint can be more productive than repeatedly failing at your deepest floor.
Choose and share a friend unit
A Mines team uses up to three of your own units plus one borrowed unit. The borrowed unit keeps its owner’s level, equipment, crests, and other upgrades. Inspect those details: the right unit name with the wrong equips may not solve your fight.
Borrow the missing role first—such as Ignore DEF, Paralysis, lifesteal, or mitigation—then build your three slots around it. Check that Arts generation stacks and that the borrowed equipment does not introduce an unwanted HP cost or ailment.
The Advisor guide reports 10% extra Quartz for using an in-game friend’s unit, compared with a randomly offered support. Take that bonus when the unit fits; a failed run is not worth the bonus.
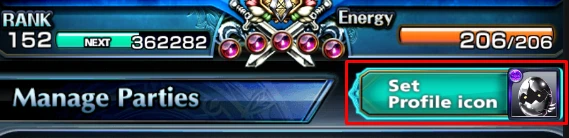
To share your own unit, open Units → Set Profile Icon → Change Unit in the source’s UI, then set its equipment. Equipment already assigned elsewhere can still be selected for that support. The guide lists stamina-potion rewards at five, ten, and fifteen uses of your shared unit; check the event’s current reward notice.
Use lures to farm a boss
Lures let you repeat a specific encounter instead of accepting random bosses. The Advisor guide lists two sources: silver chests after boss kills and Depth Bonuses in the Boss List.
- Reach a floor within the boss’s usual spawn range where you have already beaten it.
- Select Lure Wave beneath the current boss and choose the desired boss lure.
- Farm that boss during the 10-minute lure period.
You earn no evaluation points while a lure is active, so this is a farming tool, not a way to climb faster. Changing depth or activating another lure ends the current one.
You can craft a chosen lure using three lures from different bosses. Normal and Omega recipes are separate: use normal lures to craft a normal lure, and Omega lures to craft an Omega lure. Check the variant before spending them.

Prepare and test the team before activating the lure. Use a depth where you can clear repeatedly with few deaths; greater depth is only worthwhile if the extra rewards justify the slower or less reliable runs.
Quartz and event rewards
Cumulative Quartz
Bosses and smaller enemies award Quartz. The Advisor guide says deeper encounters give more, with Omega bosses awarding substantially more than regular ones. Collected Quartz advances a cumulative reward track containing items such as Alchemy Stones, Rainbow Gems, AWK Souls, keys, and Flux Drops.
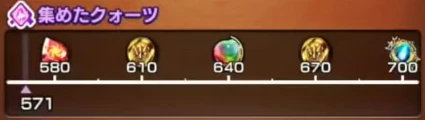
Check the event’s Limited Quests as well as the Quartz track. The guide lists separate mission rewards such as crystals, Limit Break Stones, and Flux Drops. Do not judge an event only by whether a rare equip dropped.
Pure Quartz and the exchange
Pure Quartz is a separate, very rare currency. The source lists guaranteed first-clear rewards at certain depths as well as rare drops. Check those guaranteed rewards before planning a long random-drop farm.

The Advisor guide says Pure Quartz carries between Mines openings and its exchange stock does not reset. Verify the current shop notice before assuming an item will restock.
Its suggested spending order is 5★ ticket → Limit Break Stones or Rainbow Gems → Flux Drops → Paradisos. Treat that as the author’s priority, not an automatic purchase order: inspect the ticket pool and available stock, then choose what improves your account. Saving the currency is reasonable if nothing available helps you.
Build a team with a replaceable slot
A useful baseline is damage dealer + two compatible Arts generators + a counter or defensive unit. Units that cover two jobs free a slot for the boss’s mechanic.
| Need | Useful role examples from the source |
|---|---|
| Clear waves quickly | Okarun, Summer Miyu, Hajime Saito, or Jay. Check their opening Arts and wave-reset effects rather than assuming any high damage unit will be fast. |
| Supply Arts and buffs | Ultimate Paladin Roy or Houka; choose partners whose generation stacks. |
| Survive deep floors | Teamwide mitigation from Emiya Shirou, Beta, or Saitama the Hero; add suitable defensive equips. |
| Handle high DEF or critical resistance | A damage dealer or support with Ignore DEF, such as Miyu or Shadow. |
| Break a boss | A strong breaker with Break resistance down. The source uses Godspeed Crusader Platina in several examples. |
| Counter one mechanic | Magic damage, Paralysis, lifesteal, Blind, Poison, or instant Arts, depending on the encounter. |
These are examples from the source, not a requirement to own every listed unit. Check your unit collection for the effect you need. A taunt tank can be excellent only where the boss does not punish taunts or shields.
Keep equipment for instant Arts, ailment application, resistance reduction, emergency healing, and the relevant damage resistance. For a nuke, count dependable opening Arts rather than lucky Battle Ether drops.
Survive the pre-boss waves
Early waves give you time to establish Arts generation and stack effects. They become a threat as depth increases. The source’s floor bands are planning guidance, not a promise that every enemy hits equally hard.
| Depth | Preparation |
|---|---|
| First 100 floors | Learn your opening and prepare effects before the boss. Don’t spend every equip just because the mobs are easy. |
| Floors 101–150 | Expect enemies to survive longer. Watch for the first wave that breaks your Auto setup. |
| Floors 151–199 | Bring a defensive equip or mitigation unit for dangerous opening attacks. |
| Floor 200 onward | Build for strong opening protection and reliable wave clears. Don’t assume the team that survived earlier floors will keep working. |
The most dangerous waves in the source are Elemental Kyuons, Scylla with Sardion, Ameru with Elfalla, and three Teriodos. Their early, repeated multi-hit attacks can overwhelm the team before it gets going. Freeze/control or immediate protection can buy time; Ultimate Paladin Roy’s Arts is one example used in the source.
Other waves may Freeze or Paralyze, while rare Lote, Valentia, and Golcat encounters provide helpful effects or Battle Ether. Don’t depend on those rare encounters to make a team function.
How to read the boss entries
Each entry gives the regular encounter first, then the Omega changes. Regular restrictions still matter unless the variant description says otherwise. Thresholds are taken from the source; burst-skipping a threshold is setup-dependent and should be tested before using it in a farm.
Bosses with straightforward counters
Oldeus
Bring magic damage. Regular Oldeus reduces physical damage and can inflict Curse. A physical attacker can work with enough resistance reduction in the regular fight, but magic is the simpler match. If the fight lasts, protect or cleanse the team so Curse does not disable its equipment.
Omega: physical damage is negated, and its Arts can kill cursed units outright according to the Advisor guide. The physical workaround no longer applies; use a magic damage dealer and deal with Curse.
Palamicia
Regular Palamicia has damage resistance that is removed by Paralysis. Use a reliable Paralysis source, or enough resistance reduction to overcome the regular version’s resistance. Prepare Freeze protection if you expect to take her Arts.
Omega: she negates damage unless Paralyzed, so Paralysis becomes required. The source pairs True “Griffin” with the 3★ magic equip “Gloria” for stacking Paralysis-resistance debuffs. Apply the debuffs and ailment before spending the team’s damage burst.
Degilmagna

Plan a quick kill. Regular Degilmagna’s critical hits become dangerous at depth, and Faint can interrupt your response. Prepare damage and resistance debuffs before releasing the burst.
Omega: negates Earth damage and resists reflection, lifesteal, and Arts drain. At 20% HP, it Faints the team, applies damage-resistance debuffs, and launches a heavy attack. Save protection or a suitable survival effect before crossing 20%, then finish with the next burst. The source recommends avoiding this variant around floor 200+ when the required damage and survival become impractical; that is a judgment about efficiency, not a hard game limit.
Subject β-3 / Subject Ω
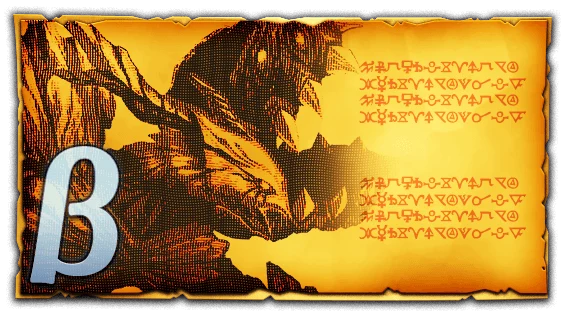
Regular β-3 punishes Light and Dark units. Its grab can Faint a unit and hit hard, so avoid those elements and bring enough protection to reach your burst safely.
Subject Ω: adds a taunt killer, Disease, and team Faint at 75% and 20% HP. The source lists a 5,000-HP hit that bypasses barriers at those thresholds. Use non-taunt mitigation and sufficient HP; a bigger barrier alone does not answer fixed HP loss. If sustaining, include Disease management. A fast kill must still account for the threshold timing.
Fosradius
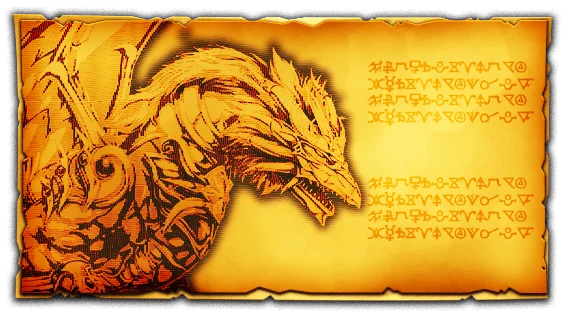
This version applies Arts damage down and Paralysis. Bring resistance debuffs to support damage, and prevent Paralysis from canceling your burst. The source considers either a fast kill or a sustained clear workable. Do not import the Giant Boss version’s physical and critical negation into this encounter.
Ugetsu
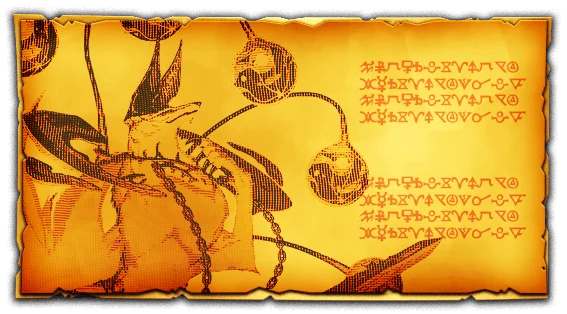
Ugetsu negates damage matching its current element and starts Dark. Avoid a Dark opening damage dealer. For a longer fight, use damage options other than Dark and Fire so its switches do not stop you.
Freeze or Disease removes its resistance; sufficient resistance debuffs are another regular-fight approach in the source.
Omega: switches elements more often, negates shields, and gains lifesteal. Keep the same damage plan, but rely on resistance and healing rather than barriers alone. The Advisor guide also flags a dangerous 30% HP burst: prepare protection before crossing it.
Garm
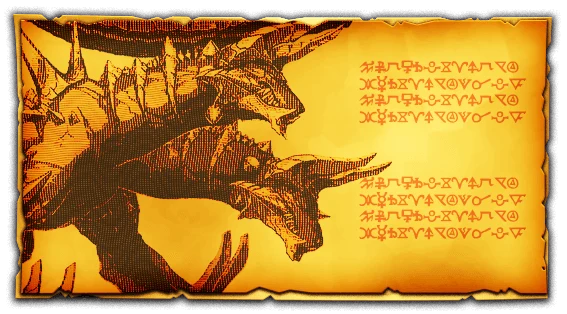
Read the required single-hit damage shown at the start of the fight; that threshold rises with depth. A sufficiently strong hit stuns regular Garm and applies ATK/DEF down, helping a quick burst. If sustaining, prepare for strong Burn and Faint; a suitable taunt tank plus Burn management is the source’s alternative.
Omega: a large individual hit grants immunity to that hit’s element. One enormous hit followed by the same element can therefore fail. Test a multi-hit damage dealer or a coordinated follow-up from another element. It also lowers Burn resistance and deals extra damage to burning units.
Raydis
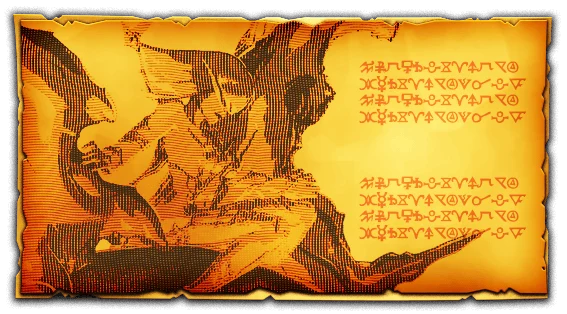
Prepare protection before the opening Arts. Raydis takes more damage while burning, but resistance debuffs are another way to support a quick kill. Manage Poison if the battle lasts: the boss gains critical rate against poisoned units. Its True Arts also punishes shielders.
Omega: follows Arts with True Arts and can Faint a random target. The Advisor guide additionally lists fixed HP loss of about 2,000 per second for eight seconds during that True Arts effect, separate from Poison. Preventing Poison alone does not cover it. Either finish quickly or activate defense/healing before that target loses control.
Mohldora
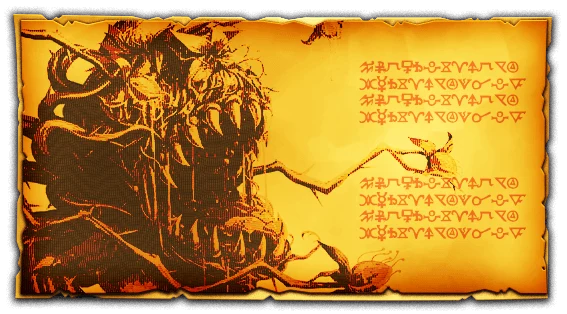
Bring enough critical rate and critical-resistance reduction for your plan. The source says its critical resistance does not reach full immunity. Its small summons only die to Burn or Poison, but they are not the main priority in the source’s quick-clear strategy.
Prepare for the attack at 50% HP.
Omega: adds reflection resistance and another attack at 25% HP. Save protection for both thresholds rather than using everything at 50%.
Bosses that need a specialist or threshold plan
Tonetaurus
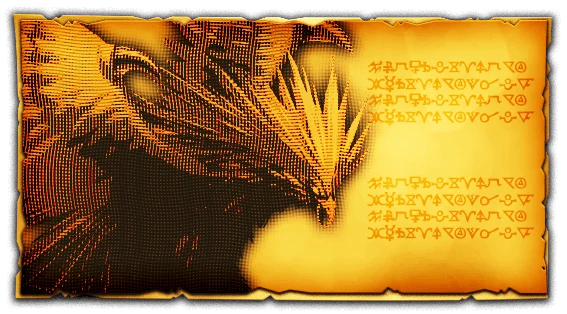
Regular Tonetaurus gains evasion with depth. Bring accuracy or evasion reduction once your usual attacks become unreliable. Poison also grows dangerous; ailment protection, cleansing, or a suitable taunt setup helps prevent a slow loss.
Omega — source marked outdated: the document recommends breaking to overcome extreme evasion, with strong Break-resistance reduction. However, its own September 2026 update explicitly marks this encounter’s advice outdated. Treat that as a starting point to check against the current battle log, not a validated modern setup. Do not rely on its old “one or two True Arts” floor estimates.
Ifrit
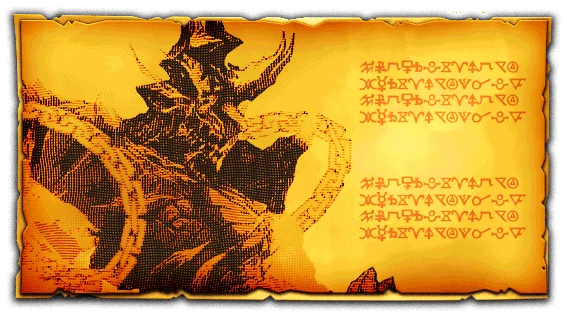
Regular Ifrit cuts the team’s HP to 50% and sets Hellfire: the source lists 2% reflected damage plus 10% HP loss every five seconds. A large burst can kill its own attacker without lifesteal. Bring lifesteal for the intended attacker, or build a sustain plan around Hellfire-resistant damage. Prepare for the 50% threshold as well.
Omega: starts the team at 20% HP, raises reflection to 5% and periodic loss to 20% HP per five seconds, and negates magic damage. Use physical damage and confirm the attacker survives its own output.
Radachne
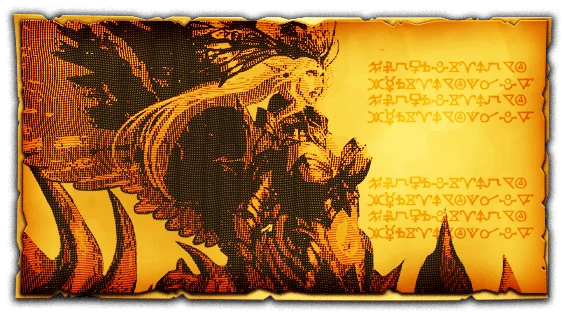
Bring Ignore DEF. Radachne negates critical hits and has high DEF, so ordinary critical support is not the answer. It also hits hard and can inflict Curse and Seal. Protect your opening, establish Ignore DEF, and kill quickly before control effects or critical hits stop your team.
Omega: adds more DEF, damage, and ramping action speed. The same counter applies, but spending a long time setting up becomes more dangerous.
Code XTF: Eraser
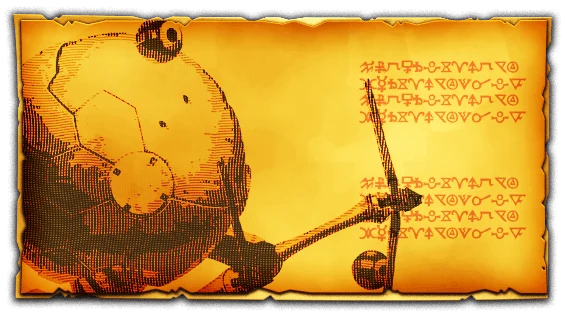
Eraser adapts to the element dealing the most damage, gaining resistance and offensive benefits. A quick kill avoids a prolonged adaptive-shield fight.
Save an answer to the zero-HP attack. It Faints the team and launches a lethal final burst. The source uses a precisely timed reflect Arts’ invulnerability window as that answer. This is a timing-specific interaction, not a promise that any reflection effect makes the team safe. Test the timing before automating it.
Omega: can gain resistance to multiple high-damage elements. The final-attack plan remains essential.
Freydal
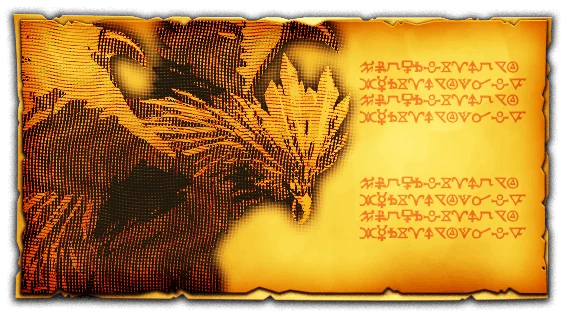
Avoid Water damage. Bring Freeze protection, accuracy or evasion reduction, and mitigation for its 50% HP attack. Freydal stacks evasion on Arts; Burn removes it, but Burn resistance rises with depth, making accuracy a more dependable deep-floor approach.
Omega: adds a taunt killer and thresholds at 75% and 25%, alongside the regular 50% threat. Use non-taunt protection. The source demonstrates skipping later thresholds with a well-timed burst after 75%; a slower team should prepare to survive them instead. The Advisor guide warns that crossing thresholds without finishing the boss can still add evasion for each threshold crossed.
Elpneumas
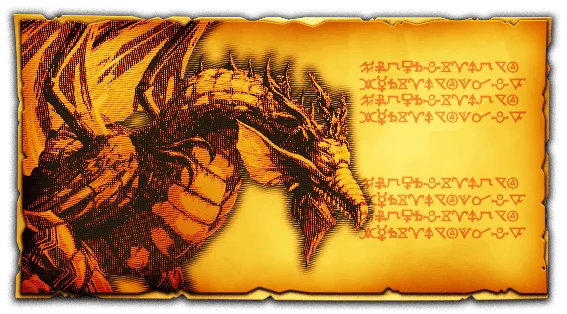
Avoid Earth damage. The regular boss has a 50% threshold with invulnerability, healing over time, and Envenom that cannot be cleansed normally. Its burrowing attacks add damage resistance and can make attacks miss; wait until it resurfaces before spending key offensive effects. The Advisor guide puts its threshold healing effect at 30 seconds, with stronger healing at greater depth. It also ignores barriers during that Arts. Bring substantial mitigation and recovery; do not treat a Poison cleanse as the solution.
Omega: moves the dangerous thresholds to 90% and 40%. Prepare defense and healing before 90%, wait out the attack, then use the next damage burst. Repeat at 40%. On deep floors, skip if your team cannot survive those forced transitions.
Villakurz
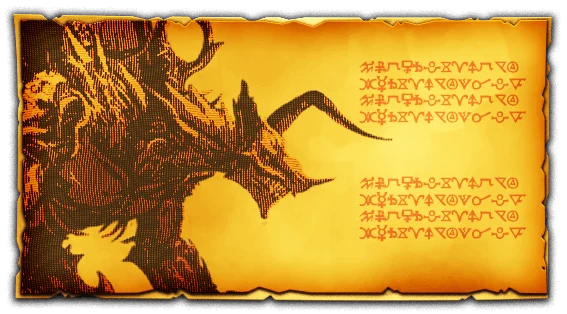
Blind interferes with your damage, and Poison/Blind can bypass taunt. Bring accuracy and a protected taunt tank for the source’s strategy. The 30% HP attack is magic damage and happens quickly: activate protection before crossing the threshold. The source uses Dark resistance and magic resistance together on the tank.
Omega: only takes damage from units that are poisoned. Let the damage dealer become poisoned before its burst. Don’t automatically cleanse away the very condition that lets it deal damage.
Zwiber Z
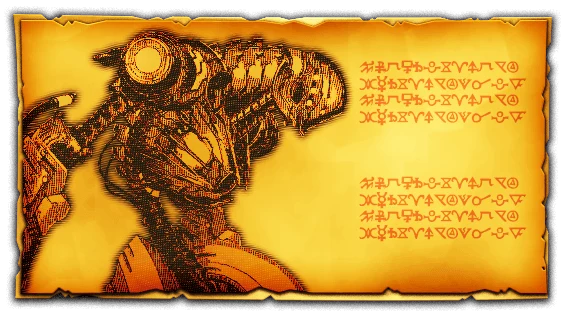
The opening spear can Faint a unit until the boss is broken. Critical resistance and damage increase as the fight develops; Paralysis and stacking Paralysis-resistance debuffs make a drawn-out fight worse.
Bring mitigation, appropriate ailment protection, and preferably Ignore DEF for deeper floors. At 50% HP, the boss becomes invulnerable around its True Arts and Faints the team. Don’t waste the whole burst into that protected interval.
Omega: has much higher DEF and critical resistance. The source’s plan requires Ignore DEF, rather than trying to force ordinary critical support through it.
Bosses that reshape the whole team
Geo Zagnus
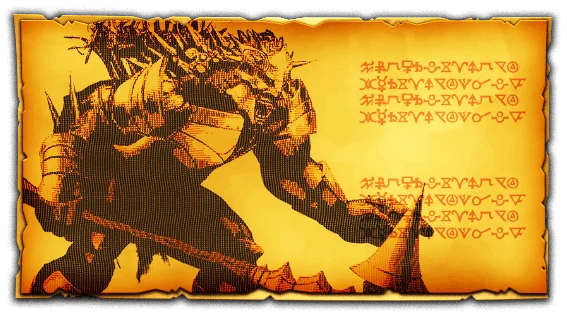
Human, God, and Demon units are punished both defensively and offensively. Build around other races where possible. The source uses Veldora or Dead Master for damage, with suitable non-Human/God/Demon supports; verify the race of the exact unit variant.
At 30% HP, expect team Faint, stronger critical attacks, and heavy Poison. A mixed-race burst team needs a deliberate survival plan, not just a strong attacker.
Omega: adds protected thresholds at 60% and 30%, strong Poison, and attacks aimed at the highest-HP unit that may drain Arts and reduce resistance. The source’s specific route uses Veldora, non-Human/God/Demon Arts support, mitigation at 60%, and a timed follow-up through the invulnerability window. Treat it as a demanding example, not proof no other team can work. Skip without a tested answer to both thresholds.
Wilkes
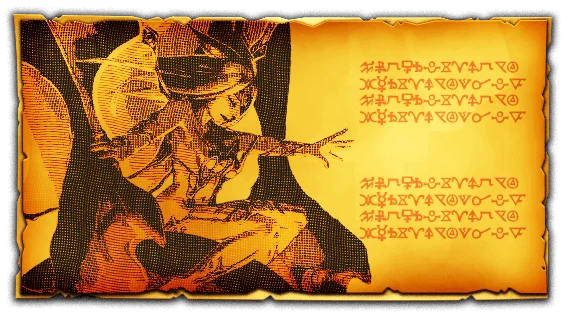
Bring instant Arts, a non-Human damage dealer, Blind, and mitigation. Regular Wilkes negates Arts generation over time and heavily resists Human damage. Blind increases the damage it takes.
At 30% HP, it drains 100 Arts, becomes invulnerable during True Arts, and gains critical resistance. Save instant Arts and protection for this transition instead of depending on an ongoing generation buff.
Omega: inverts Arts generation and drains 200 Arts at 30%. Avoid applying unwanted generation-over-time effects. If a damage dealer has unavoidable self-generation, the source recommends synchronizing instant-Arts equips so it can act before its gauge drains away.
Stiria
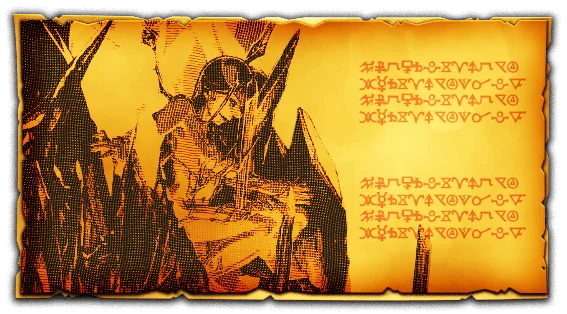
Avoid Fire damage. Stiria gains vulnerability through Break, but each Break raises its Break resistance. At depth, the source favors strong damage buffs and resistance debuffs rather than a slow repeat-Break plan.
Prepare Freeze protection, mitigation, and recovery for unmitigable HP loss. The sources disagree on the timer: Monokhrome lists the first hit around 20 seconds and repeats every 50 seconds; the Advisor guide says every 30 seconds. Keep recovery ready and watch the current fight rather than building Auto around either unverified schedule. Barrier size does not replace healing that loss.
The Advisor guide also notes stacking Freeze-resistance debuffs on Arts and increased damage against frozen teams. A single 100% Freeze-resistance effect may stop being enough once those debuffs accumulate. Expect protected Arts at 50% and zero HP. The Advisor guide spells this boss “Styria.”
Omega: increases the fixed damage, punishes frozen units more, gains resistance based on how many units are frozen, and adds resistance debuffs. The source recommends skipping deep encounters when the time and survival cost become excessive.
Marzex
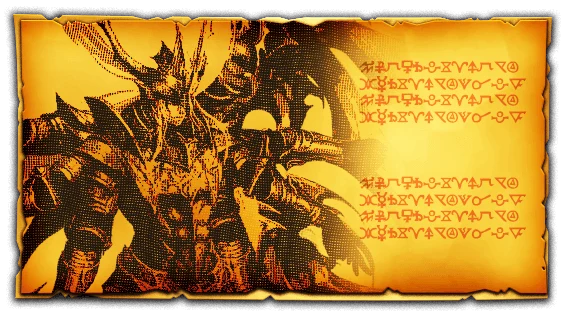
Bring a breaker and non-Light/Dark damage. Marzex periodically halves current HP and takes more damage from low-HP attackers. Use controlled recovery: enough to survive, without assuming that keeping everyone full is the damage plan.
Break creates the damage window and can bypass the 50% threshold. The source recommends finishing during Break to avoid more evasion and ATK debuffs.
At zero HP, Endless ignores barriers and deals heavy typeless, elementless damage. A tank needs the right resistance and survival setup; physical-only or magic-only resistance is not a complete answer.
Omega: fully negates Light/Dark damage and gains more offensive and critical-resistance effects. The source favors a tested Break burst or skipping at high depth.
Ragsherum
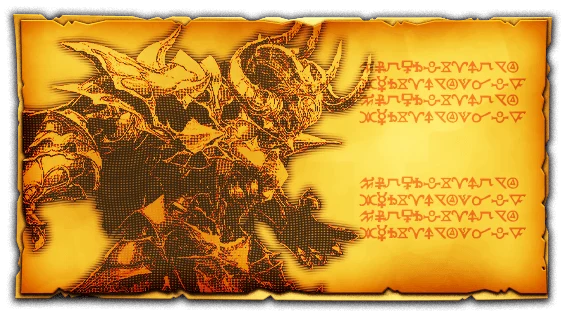
Ragsherum negates barriers, punishes Light units, and becomes more vulnerable when poisoned or after Break. The source’s quicker route uses Poison with Poison-resistance reduction, plus strong damage-resistance debuffs.
Watch the opening: if it jumps, wait before using an ailment-resistance debuff equip so the hit does not miss. Finish before repeated maximum-HP reductions make the team too fragile.
Omega: Poison resistance scales with depth. At 50% HP, it uses Arts and gains critical resistance. After leaving Break, it can Faint the highest-HP unit and begin True Nightmare, protected by a shield that takes physical damage only. Break that shield to cancel the attack. The source’s deep-floor route requires a specialized sustained team; don’t copy a shallow-floor nuke without accounting for this phase.
Choose equipment worth farming
Mines equipment is rare, and the Advisor guide reports better drop chances at greater depth without giving verified rates. Farm the deepest floor you can clear reliably, not simply the deepest one you have unlocked. Use a lure only after testing the relevant boss and variant.
The source lists ten limit breaks to fully limit-break these farmable equips, using duplicates or the appropriate equipment Limit Break Stones. That is a substantial investment. Keep useful drops, but spend stones only when improving the cooldown enables a specific team. An item used only for its passive often needs no limit breaks.
Start with a use case
These are practical candidates from the Advisor guide, with their drawbacks kept visible. Check the equipment database for the current item details and compare them with what you already own.
| Boss | Drop | Why you might farm it | Cost to plan around |
|---|---|---|---|
| Palamicia Ω |  Sacred "Silent Treasure" Sacred "Silent Treasure" | Teamwide instant Arts; the source lists 35 Arts and a critical-damage buff on a 30-second cooldown. | Consumes 15% of each ally’s current HP. Make sure your recovery can support repeated use. |
| Palamicia |  Holy Necklace "Dignified Silence" Holy Necklace "Dignified Silence" | A 4★ support-slot option for an instant burst of Arts to the other three allies. | Drains up to 50 Arts from its user. Plan whose gauge you can afford to spend. |
| Subject β-3 |  Hatred Claws "Grief" Hatred Claws "Grief" | Self Arts generation in a 4★ physical slot: 2 Arts per second for ten seconds, with a ten-second cooldown in the source. | Uses 25% of current HP per activation and lowers maximum HP by 15%. Recovery matters as much as theoretical uptime. |
 Subject Ω Subject Ω |  Shrieking Claws "Despair" Shrieking Claws "Despair" | Stackable physical-resistance reduction for a team that can sustain repeated use. | Each use costs 30% of the user’s maximum HP. Do not put it on unattended Auto without testing survival. |
| Ugetsu |  Blaze Garb "Akanehitoe" Blaze Garb "Akanehitoe" | General damage-resistance reduction from a 4★ magic slot for a short burst. | Repeated uses stack a permanent resistance penalty on the user, up to 50%; it also lowers DEF. |
 Ugetsu Ω Ugetsu Ω |  Hellflame Garb "Gurenhitoe" Hellflame Garb "Gurenhitoe" | Stackable Fire/Dark resistance reduction for a longer fight. | Consumes Arts and HP; requires time to stack and lowers the user’s DEF. It is not an instant maximum-strength debuff. |
| Fosradius |  Dragon Gauntlet "Sol Helios" Dragon Gauntlet "Sol Helios" | General ailment-resistance reduction can combine with ailment-specific debuffs. | Lowers your team’s ailment resistance too. Use it deliberately for an ailment check. |
 Mohldora Ω Mohldora Ω |  Despair Vine "Groldola" Despair Vine "Groldola" | Strong self ATK/Earth damage buffs for a suitable attacker with a magic slot. | Consumes up to 50 Arts; budget that before the intended damage Arts. |
| Garm |  Blaze Coil "Annulus" Blaze Coil "Annulus" | Passive 25% physical damage for a 4★ physical slot. | Reduces the user’s Break power by 100%. Do not assign it to your breaker; cooldown upgrades do not improve the passive. |
| Eraser |  Alloy Shield "Arda Core" Alloy Shield "Arda Core" | The source lists 40% team damage resistance for ten seconds, useful for a carefully timed final attack. | The next ten seconds apply 40% resistance down. Repeated Auto use can make the team more vulnerable. |
Instant-Arts equipment can help against Wilkes, but Grief’s generation over time is not instant Arts and does not solve that encounter. Also account for HP costs when choosing gear for Ifrit or any boss with unavoidable HP loss.
Other drops: keep the drawback in view
Many Mines equips trade one benefit for a substantial penalty. Before farming a niche item, identify the exact fight where its benefit outweighs that penalty.
| Boss | Drop | Omega drop | Main tradeoff in the Advisor guide |
|---|---|---|---|
| Oldeus |  Hades Earrings "Halos Mors" Hades Earrings "Halos Mors" |  Sealed Earrings "Filiamo" Sealed Earrings "Filiamo" | Halos Mors speeds skills while slowing equipment recovery. Filiamo has a long cooldown and reduces its user’s stats. |
| Tonetaurus |  Emerald Feather "Biosdora" Emerald Feather "Biosdora" |  Night Feather "Noxahra" Night Feather "Noxahra" | Biosdora offers a small accuracy passive and targeted healing. Noxahra boosts a target’s recovery but reduces its damage. |
| Degilmagna |  Crimson Blade "Degilagon" Crimson Blade "Degilagon" |  Despair Blade "Degil Alter" Despair Blade "Degil Alter" | Degilagon supplies Burn while reducing user DEF. Degil Alter reduces enemy Fire resistance but also lowers allied Fire damage. |
| Mohldora |  Starving Root "Trypdola" Starving Root "Trypdola" | Despair Vine "Groldola" | Trypdola is a chance-based Poison option that lowers user durability; Groldola is covered above. |
| Ifrit |  Incensed Helm "Astragoth" Incensed Helm "Astragoth" |  Shadowflame Helm "Helioskia" Shadowflame Helm "Helioskia" | Barrier effects come with critical-resistance or ATK penalties. Do not assume these are upgrades over ordinary resistance equips. |
| Garm | Blaze Coil "Annulus" |  Ruinous Coil "Galelion" Ruinous Coil "Galelion" | Galelion’s Fire-damage passive comes with a 50% stat penalty for the first minute, making it a poor fit for many quick clears. |
| Raydis |  Emotional Soul "Stella Bough" Emotional Soul "Stella Bough" |  Withered Soul "Meteor Bough" Withered Soul "Meteor Bough" | Stella Bough heals the team but lowers ailment resistance. Meteor Bough’s large targeted heal becomes weaker with repeated uses. |
| Radachne |  Divine Arachnid's Blood Divine Arachnid's Blood |  Divine Arachnid's Tears Divine Arachnid's Tears | Blood buys team critical rate with user HP. Tears supplies targeted instant Arts at an extreme HP cost: the source lists 99% of the target’s maximum HP. |
| Eraser | Alloy Shield "Arda Core" |  Anti Shield "Abyss Core" Anti Shield "Abyss Core" | Abyss Core’s resistance depends on ailments on its target and reduces that target’s damage. Its defense can disappear when those conditions change. |
| Geo Zagnus |  Fortress Armor "Geoplate" Fortress Armor "Geoplate" |  Stronghold Armor "Geocradle" Stronghold Armor "Geocradle" | Offensive Water buffs come with HP drain; Geocradle drains maximum HP repeatedly during the opening 50 seconds. |
| Wilkes |  Shielding Edge "Will Craver" Shielding Edge "Will Craver" |  Abyss Edge "Scar Craver" Abyss Edge "Scar Craver" | Both Faint their user for five seconds. Scar Craver adds generation over time, which is especially unsuitable against Wilkes herself. |
| Villakurz |  Skull Helm "Dusk Roar" Skull Helm "Dusk Roar" |  Void Helm "Disaster" Void Helm "Disaster" | Dusk Roar trades physical resistance for magic resistance. Disaster gives physical resistance while reducing team ATK. |
| Freydal |  Winged Mail "Blue Pinions" Winged Mail "Blue Pinions" |  Occult Wings "Rafale" Occult Wings "Rafale" | Blue Pinions reduces critical damage but increases other damage taken. Rafale’s short protection is limited to three hits and lowers team ATK. |
| Elpneumas |  Scaled Branches "Aurora" Scaled Branches "Aurora" |  Occult Branches "Seratta" Occult Branches "Seratta" | Offensive buffs consume Arts; Seratta drains Arts from the whole team. |
| Stiria |  Sub-Zero Soles "Chilblains" Sub-Zero Soles "Chilblains" |  Glacial Soles "Frostpain" Glacial Soles "Frostpain" | Chilblains supplies Fire resistance but Freezes its user. Frostpain supplies Water/Freeze resistance while stacking a long damage-taken penalty. |
| Zwiber Z |  Nano Barrier "Zweitschild" Nano Barrier "Zweitschild" |  Exclusion Barrier "Azulveidt" Exclusion Barrier "Azulveidt" | Zweitschild protects Water/Light units while lowering team ailment resistance. Azulveidt’s protection depends on the enemy staying Burned, Poisoned, or Blinded. |
This equipment catalogue reflects the Advisor guide’s coverage. It does not provide Marzex or Ragsherum drops, so those are not inferred from another mode. The source also lacks detailed Tonetaurus Ω and Degilmagna Ω battle sections despite listing their equipment; it does not resolve Monokhrome’s outdated Tonetaurus Ω advice.
Choose a reliable farm
For repeated clears, test the whole run: first-wave survival, equipment readiness at the boss, ailment timing, and any final attack. A successful manual clear does not prove an Auto setup is dependable.
Use Monokhrome’s linked videos for exact roster-specific timing, and inspect current clear examples when your units differ. Its claims that a particular boss becomes “impossible” or must be skipped at a certain floor describe the author’s setups and efficiency judgments—not permanent limits on future teams.