

Crest Bosses Guide
Pick the shrine, check its damage restrictions, and prepare for the attack that ends most runs. Each entry explains what your team needs and when to use it.
Adapted from GSGL Official Discord's Crest Palace Guide, updated November 10, 2025. Shrine images come from that guide; the Nova sections also use its linked companion guides, credited below.
On this page
Before choosing a shrine
This page covers the Crest Palace encounters and difficulties named below. The Mines and Giant Boss versions of a familiar boss can behave differently.
Crests are an extra improvement after your team has its essential upgrades and equipment. Choose a difficulty you can farm reliably; a difficult one-off clear is not automatically an efficient farm. See the technical guide’s crest section for that decision.
The source’s team rankings span different eras. Here, the focus is on the role or effect you need. Named units are examples, and a newer unit can fill the same role if its kit meets the encounter’s requirements.
Find the encounter
These weekdays are the source’s PST schedule, not a conversion to your local time. Confirm the current rotation, campaign, and available difficulty on Crest Palace or in-game.
| Source schedule | Shrine and covered encounter |
|---|---|
| Permanent | |
| Monday | |
| Tuesday | |
| Wednesday | |
| Thursday | |
| Friday | |
| Saturday | |
| Sunday |
Crest rewards and Crest Burst
The regular crest reward goes to the leader, or your leftmost unit in multiplayer. Check that position before starting a long farm.
The source describes these fragment rules:
- Rejecting an ordinary crest converts it into a fragment of its level.
- Rejecting a level 1+ through 4+ crest gives five fragments of the corresponding ordinary level.
- Ten fragments can make an ordinary crest of that level, or one fragment of the next level within the available crafting options.
- “+” crests and level 5/5+ crests cannot be crafted this way.
Crest Burst is a separate Nova event. It upgrades an eligible leader’s level 4 crest to 5, or 4+ to 5+. If several crests qualify, the game selects one at random. The source says a burst cannot be rejected and replaces the normal crest drop for that run.
For a 5+ attempt, make sure the leader already has a 4+ crest and review its other eligible slots. Do not expect a burst after a fixed number of runs.
Permanent encounter
Temple of Heavenly Light — Radachne (PRO)


Bring ailment management, protection, and preferably accuracy. Wyrms can inflict different ailments; Big Fraid can drain Arts and wipe an unprepared team. Clear dangerous adds before they disrupt your setup.
Radachne gains a healing/evasion barrier at the start and around 80% and 50% HP. Remove it before committing your damage. Below 30%, she enrages and becomes much more dangerous.
Some attacks punish Light, Dark, or Earth units. A well-supported non-Light/Dark taunt tank is one source strategy for keeping vulnerable allies safe. Avoid pushing her into enrage while a delayed 50% barrier is still active unless your team can survive it.
The source lists three daily attempts; check the current quest limit in-game.
Monday encounters
Shrine of Oblivion — Oldeus (PRO)


Break first, then deal damage. Oldeus evades attacks until broken, negates Dark damage, and deals much more damage to Light units. Use a breaker with a suitable non-Dark damage dealer; protect any Light support you choose to bring.
Its attacks remove barriers and can inflict Poison. One Arts sets the highest-current-HP unit to 1 HP, ignoring taunt and resistance. Have burst healing ready if the fight lasts.
For a quick clear, prepare Arts on the earlier waves, apply Break support, and release the damage burst during Break. Est’s Break-bar reduction is one historical example; the required job is fast, reliable Break.
Shrine of Perdition — Valzandeth (Extreme)

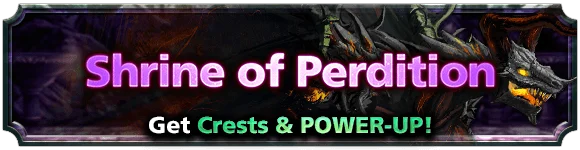
Bring Burn for Grangarrod, Blind for Cyclops, and strong magic protection. These adds also appear during the boss fight. Leaving them alive allows Paralysis-resistance debuffs and Arts drain to build up; those effects can bypass taunt.
Valzandeth applies long-lasting damage-resistance debuffs, making later attacks hurt more. At 70% and 30%, it speeds up and summons more adds through Roar of Ruin.
Keep protection ready at zero HP. It becomes invulnerable, charges its orbs, then uses the critical magic attack Shadow Lightning before dying. A suitable magic-focused tank, such as Miranda in the source examples, still needs defensive equipment and support. Don’t spend the last defensive cooldown merely to finish the HP bar.
Tuesday encounters
Shrine of the Burning Chains — Ifrit (PRO)

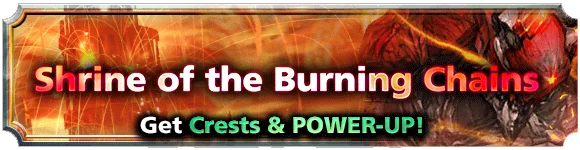
Bring Freeze, Burn management, and recovery for the opening. Ifrit starts by reducing the team’s current HP to 15% and burning both himself and the party. He also punishes Machine and Spirit units.
Freezing Ifrit removes his self-Burn, slowing him and removing the extra Water resistance it grants. Water damage works much better once that Burn is gone. Freeze can fail, so keep a defensive fallback.
Some attacks heavily reduce healing received; HP/stat-up recovery can help where ordinary healing is weakened. Save mitigation or a timed Freeze for Vulkan Knuckle at low HP, rather than assuming the last part of the fight is safe.
Shrine of Crimson Sea — Ignis (Extreme)

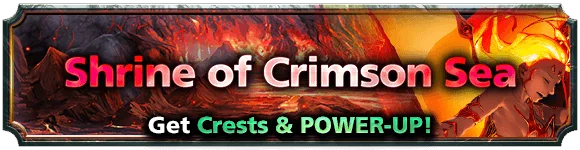
Avoid Fire damage and bring lifesteal for a sustained damage dealer. Hellfire affects the pre-boss waves too: it reflects part of your damage and drains HP periodically. The source describes that reflected damage as bypassing ordinary mitigation, barriers, and redirection.
Ignis ignores DEF, so use damage resistance rather than relying on DEF buffs. Prepare for the strong Blazing Impact opening and its return after three charging Arts. Below 30%, increased damage and regeneration make a slow finish riskier.
The source also describes a specialized Duran reflect clear: prepare 300 Arts, use Normal Arts on wave 2, clear quickly, then True Arts on the boss wave. That is a specific overlapping-reflect setup, not a generic recommendation to bring any reflect unit. Test the whole sequence before farming.
Shrine of Cinderplume — Flogassa (Nova)


Bring non-taunt mitigation and burst recovery; avoid relying on healing over time. The linked guide was drafted from JP clears before Global release, so treat its teams as examples. Cinderplume companion guide.
| Wave | What your team must handle |
|---|---|
| 1–2 | Set up Arts and buffs on the ordinary mobs. |
| 3: Arosdea | Potent Earth and taunt killers. It targets the highest damage dealer and gains critical-damage buffs at 80%, 50%, and 30% protected True Arts. Mitigate before crossing each threshold. |
| 4: Flogassa | Punishes HP auto-recovery effects. Bring burst healing instead, alongside sustained mitigation. Break or strong resistance debuffs improve damage. |
Flogassa periodically deals a fixed 3,000-damage hit in the source, and alternates magic and physical Arts. Expect protected True Arts at 50% and zero HP. Keep enough HP and protection for the final attack. Damage can slow near thresholds; don’t mistake that for a reason to waste every cooldown at once.
Wednesday encounters
Shrine of the Azul Knight — Palamicia (PRO)


Prefer non-Human/God support and damage that does not depend on critical hits. Palamicia punishes those races and has very high critical resistance. She also heals from incoming damage until her first Arts, making an immediate burst inefficient unless your setup specifically handles it.
Use Arts to remove counter stances. Skills or equipment damage can trigger the counter; Arts/True Arts dispel the stance without doing so. The more dangerous counter drains 100 Arts from affected units.
Her Arts remove barriers. Below 50%, she acts faster and Faints the team during her stronger Arts. Heal and apply resistance before it starts. Blind is a useful additional defense; barriers alone are not sufficient.
Shrine of Diamond Dust — Freydal (Extreme)


Solve evasion and bring Freeze/Poison management. Icicle Cage reduces stats and repeatedly disrupts Skill recovery, so don’t make an essential counter depend on frequent Skills.
Choose one approach to Storm Mode: enough accuracy/evasion reduction, or Burn/Poison damage to deplete its special bar. Normal Break is not the same as clearing that bar. Storm Mode returns after Blau Vortex.
| HP threshold | Prepare for |
|---|---|
| 70% | Faster actions and an immediate Arts. |
| 50% | Ultra Storm Mode: much higher evasion. The source warns that 100% accuracy alone is insufficient. |
| 40% | More damage, a resistance debuff on your team, and another Arts. |
| 20% | Faster Arts charging. |
Blau Vortex is magic damage with a critical-rate boost and Freeze at the end. Save magic/general resistance, then be ready for the following Howl. The lower max HP from the terrain makes uncontrolled Poison especially dangerous.
Shrine of Zone Zero / Frigidity — Aerugraxes (Nova)


The overview calls this Zone Zero; its linked walkthrough calls it Shrine of Frigidity. Match the boss and difficulty in-game rather than treating those names as separate fights. The companion document labels its team suggestions outdated. Aerugraxes companion guide.
Bring physical and magic coverage, non-taunt mitigation, and Water resistance.
| Wave | Plan |
|---|---|
| 1 | Prepare your team on the ordinary enemies. |
| 2: Germose and Leader | Handle Freeze. Leader heavily resists magic and heals the enemies, so bring physical damage. Germose attacks at 50%. |
| 3: Saar and Leader | Saar has physical evasion and removes barriers; magic or accuracy helps. Leader still needs physical damage. Mitigate Saar’s 70% and 30% True Arts. |
| 4: Lozze and Leader | Break improves damage, but repeated Break also strengthens the threat. Equipment Break is weakened. Build a decisive damage window rather than a long loop of ATK debuffs. |
| 5: Aerugraxes | Taunt killer. Burn increases damage taken, while long-lasting resistance and recovery debuffs make a drawn-out fight worse. |
Prepare for Aerugraxes’s 80%, 50%, and 20% True Arts. It gains Earth resistance, then Burn resistance, then critical resistance and damage. Use general/magic/Water protection and finish before repeated debuffs overwhelm recovery.
Thursday encounters
Shrine of Aberration — Gorondola (PRO)

Bring ailment management and an answer to Arts drain. The adds can inflict Seal, Curse, and Poison, reduce stats or action speed, and drain Arts. Gorondola itself can remove 100 Arts from affected units.
A taunt tank can concentrate much of that disruption onto one unit, but the tank still needs protection from Seal and enough Arts to keep its defense active. Thetis with his relevant True Equip is one source example. A teamwide resistance/cleanse setup is another option, but it does not automatically prevent Arts drain.
Keep the recovery and Arts supply stable, clear troublesome adds, and avoid using every support equip immediately before a drain.
Shrine of Eternity — Elpneumas (Extreme)


Use non-Water physical damage and bring Burn. This Elpneumas negates Water and magic damage. Burn increases the damage it takes. Support units can still be useful even when their own attacks are ineffective.
The earlier Noble Sardines negate Dark damage and can inflict strong Blind and ailment-resistance debuffs. Prepare a way through those waves as well as the boss.
The burrowing attack gives invulnerability and can inflict a strong healing-blocking Disease. Manage Disease and Poison together; more healing does not help while that healing is prevented.
At 70% and 50%, critical attacks grow more dangerous. Below 30%, it speeds up and switches to a stronger magic Arts. Save mitigation and the final damage burst for that phase.
Friday encounters
Shrine of Adamantine — Fosradius (PRO)


Prefer Light/Dark units and a non-critical damage plan. Fire, Water, and Earth units face both high resistance and killer damage. If you bring one for support, protect it deliberately.
The source lists both very high critical resistance and critical-rate negation. The practical takeaway is clear: do not rely on ordinary critical support to supply your damage.
Fosradius resists Dark more above 50%, and Light more below 50%. At 50% and 20%, Judgement Breath Faints units and drains Arts. Activate defense before crossing those points. Below 50%, its damage increases, while Paralysis, Blind, and accuracy debuffs can disrupt the finish.
Shrine of Caliginosity — Celia (Nova)


Bring mitigation, reliable Arts, and preferably Break plus Ignore DEF. This Nova is covered directly in the main Crest source.
| Stage | What matters |
|---|---|
| Wave 3: Regulus | Break reduces his large damage resistance. Prepare for invulnerability and stronger attacks at 50% HP. |
| Wave 4: Feena | Potent Demon killer; her Arts remove barriers. Demon units need enough real resistance to survive without their shield. |
| Celia above 50% | Repeated attacks build long-lasting resistance debuffs, and Arts weaken recovery. A move targets the highest current HP unit, Faints it, drains its Arts, and applies HP loss. |
| Celia below 50% | Gains critical resistance and stacks DEF. Ignore DEF helps prevent damage from falling away. |
Endless is typeless and lasts about 12 seconds. Keep appropriate protection active for the full attack; magic-only resistance does not cover all of it.
At zero HP, Celia uses the magic attack Apocalypse while invulnerable. Save barriers and magic/general mitigation for it, accounting for the resistance debuffs accumulated during the fight. Reaching zero HP is not yet a clear.
Saturday encounters
Shrine of Whirlwind — Belgiras (PRO)


Poison is required. Damage is capped at 1 when Belgiras is not poisoned. Bring a reliable Poison source, confirm it has landed, then use your damage burst.
Avoid exposed Water units because of Water killer. Prepare enough Arts generation to recover from both its instant 100-Arts drain and its gauge-draining effect over time.
The earlier mobs can slow actions or reduce ATK, making a nuke weaker than expected. Clear them before those debuffs where possible. For a sustained clear, refresh Poison and maintain recovery instead of assuming one ailment application lasts the whole fight.
Shrine of Cursed Claw — Subject γ-2 (Extreme)


Build for repeated Break. The source’s strategy expects at least two Breaks before a strong damage window. Fire units deal more Break here; Break-resistance reduction is also valuable.
Protect against Freeze and Disease in the earlier waves. The boss punishes Gods and Demons, can grab the unit with the highest Arts gauge, and repeatedly stacks offensive buffs and resistance debuffs. A taunt does not prevent every Faint effect.
At 50% and 25%, prepare Freeze resistance and defense before pushing the threshold. Finish quickly after the later transition.
Voghan is a source example for accelerating later Breaks, but his sequence depends on timing and kit behavior. The essential plan is a reliable breaker, enough Arts to keep it working, and a protected damage burst once resistance falls.
Sunday encounters
Shrine of Discordia — Subject β-3 (PRO)

Protect against the opening Arts drain and the grab. The opening Mad Blader drains 100 Arts and heavily lowers ATK. A well-supported taunt tank can keep that disruption away from the other units.
The boss resists all five elements, so damage-resistance debuffs help. Its grab Faints a target, drains Arts, and lowers resistance, making a follow-up hit dangerous.
Below 50%, damage and action speed increase and attacks can inflict Curse. Keep the tank supplied with Arts, activate defensive equips before it is disabled, and aim for a short final phase. A taunt unit without enough recovery and Arts is not a complete solution.
Shrine of Tribulation — Za’remnah (Extreme)

Put your essential breaker in slot 1. Phantasm Lock chooses a unit in slots 2–4, Faints it, drains its resources, and prevents recovery until the boss is broken. Losing your only breaker to that lock can end the run.
Bring a strong breaker, healing, and redundant Arts support so one locked generator does not stop the team. Avoid God units where possible and use a damage plan that handles critical resistance. Duke is the source’s historical breaker example, not a claim that future alternatives cannot work.
Prepare for a protected attack at 50%. The source labels that attack inconsistently as physical and magic, so general damage resistance is the dependable recommendation here rather than relying on only one type.
At zero HP, a magic final attack applies resistance down. The source describes a precisely timed Break that can skip it; otherwise keep protection ready to survive it.
Shrine of Sagacity — Fongion (Nova)


Bring Paralysis protection, a breaker, and long-lasting or passive mitigation. The companion guide was drafted from JP clears before Global release; use the mechanics to build your team rather than treating its lineup as mandatory. Sagacity companion guide.
| Wave | Plan |
|---|---|
| 1–2 | Accuracy helps with evasive mobs. Start the team’s Arts cycle. |
| 3: Elfalla | Frequent Paralysis and stacking Paralysis-resistance down at 80%, 50%, and 20%. Recheck protection as debuffs accumulate. |
| 4: Fongion | Resists Human damage and reduces Break from Gods. At 50%, it stops taking damage until broken. |
At 70%, Fongion gains critical resistance. Its Endless attack at 50% applies Faint and resistance down, then lands after a long delay—about 30 seconds in the source. A short defensive equip used at the start can expire before the main hit. Build mitigation that still covers the impact.
The first time it reaches zero HP, it revives to 30% and switches its regular Arts to Endless. Save enough Arts, protection, and damage to finish the revived phase. Do not spend rare limit-break resources solely to copy an old example team’s optional slot upgrade.
Turn a clear into a farm
Check the leader, test every wave, and watch a complete repeat loop. Your setup must handle early debuffs, boss thresholds, cooldown gaps, and final attacks—not just produce a good damage number once.
For a crest’s effect or a unit-specific recommendation, use the source’s linked references. For the next encounter, return to the Crest Palace list and match the shrine and difficulty before reusing a team.